20 - Thinking on the game loop and starting the UI
So far, I have been working on the game without taking the time to write down the logic of the game loop. But without it, it is not possible to start working on the GameState or on the UI.
So, I started by drawing a diagram with a basic color scheme: white background means I am sure about the step, yellow means it will be in the game but I don’t know exactly how it will be setup and red means that I am not sure about the step so it is not a priority as this point. For exemple in the picture bellow, working on a story introduction video or on some kind of items store does not make any sense for the moment.

My first iteration on the game loop
This image gave me a clear idea of the areas where I need to brainstorm but also where I can already start working. On one hand, I need to focus on the game loop so I can begin playing with the GameState in Unreal. On the other hand, I can already start designing the UI and the main menu.
In Unreal, I created a basic level called MainMenu. In the level in copied the sky and the lights parameters from the TinyTown map to have the same ambiance when I position a main menu scene. Then, I created a user widget blueprint called WBP_MainMenu and in the level blueprint I added it to the game on BeginPlay. I also set the input mode to UI only.
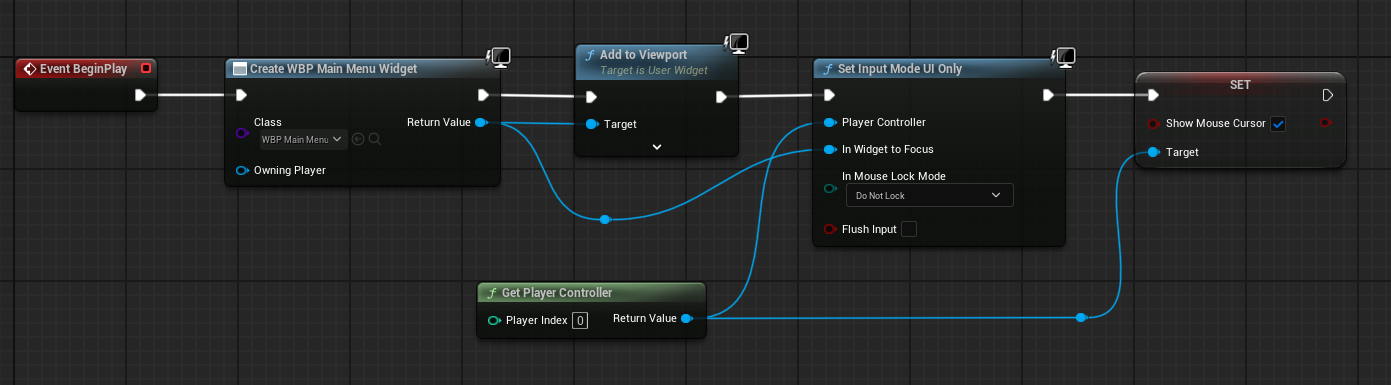
The MainMenu level brueprint adding the WPB_MainMenu to the screen
In the WBP_MainMenu I created a canvas panel with a vertical box and four buttons for “Start”, “Shop”, “Options” and “Quit”. On button “Quit” pressed, I added the QuitMenu with a horizontal box with buttons for “Yes” or “No” and a question: “Are you sure you want to quit?”. I also set the visibility logic to move from the MainMenu to QuitMenu back and forth. And for the “Start” button I used the OpenLevel function with the TinyTown map as LevelName.
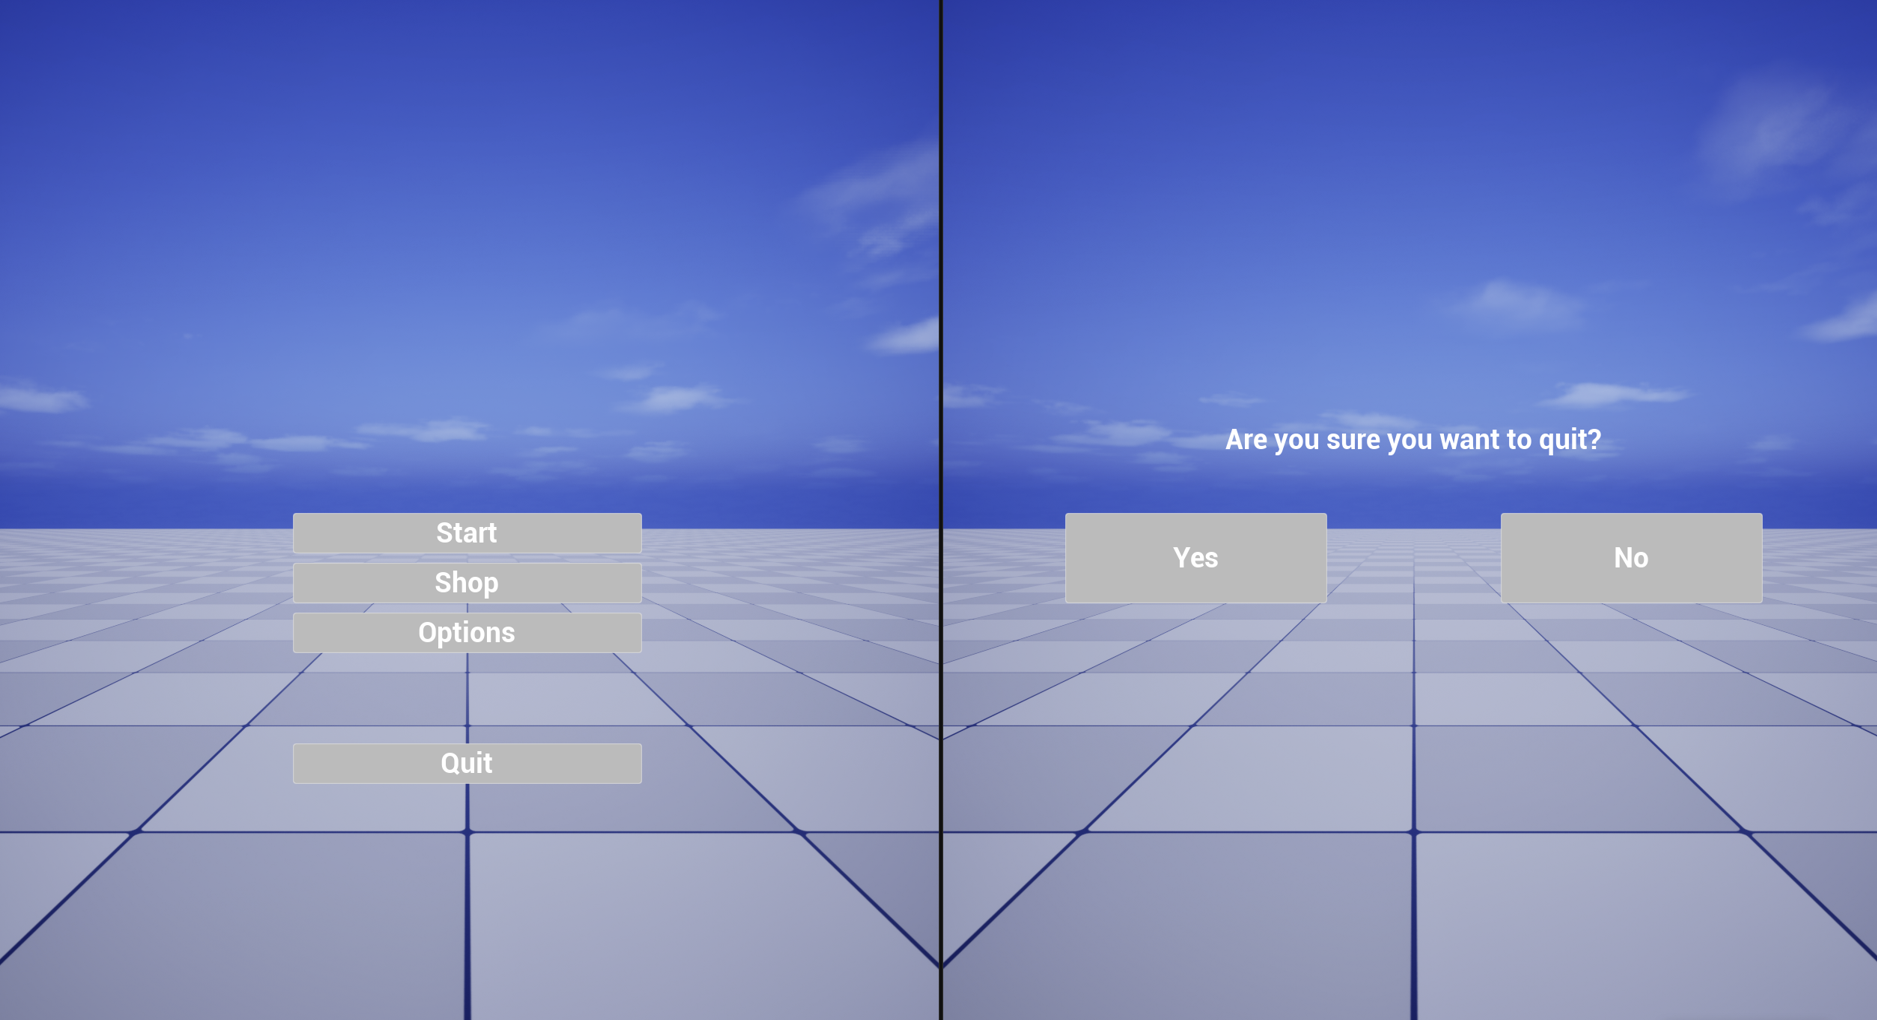
The current state of the menu